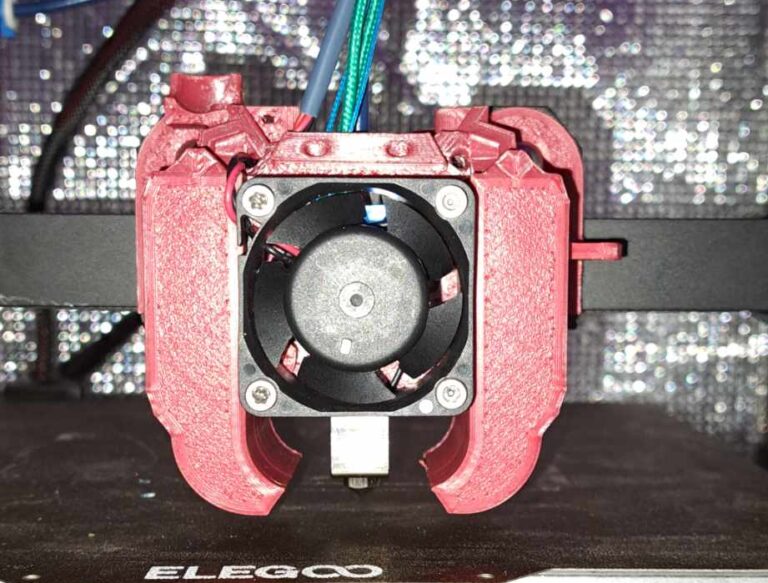

Me and my friend long time ago bought broken neptune 2s printers from elegoo. It was a bargain, since cost of both machines was 160$! The problem is that this machine is basically worse then ender 3.
Could I solve it?
The mount needs to fulfil a couple requirements in order to get my seal of approval.
I wanted something that will be cheap, have a good melting zone, can withstand up to 350c and accepts v6 nozzles, since it is the standard that will cost you the least amount of money. I can get hardened steel nozzles here for 3.50$. Also the hotend needs to mount into oem mounting studs. Some aliexpress digging later I found this: Ender 3 style hotend. It had dimensions in the description, looks nice comes with silicone and can do 550c but I don't believe it.
I'm fan of big fans for hotends so the plan was to use sunon maglev 24v 4020 fan and for part cooling 2 x 4010 radial fans. I'm obsessed with weight reduction, so I wanted to make those fan to fit really tight and close to the original mounting.
I've printed some extruders in the past, and my favourite one is sailfin due to incredible weight, I can print one from ASA and it takes standard BMG guts. So that was a choice for this build to be mounted on the carriage as direct drive, but also the mount must have option for bowden setup for my friend printer.
So now the requirements are known, so the cad madness begins!
Since the hotend manufacturer gives us the dimensions of certain parts, I just copied values that were necessary and quick sketch later we know everything that is in scope of this project:
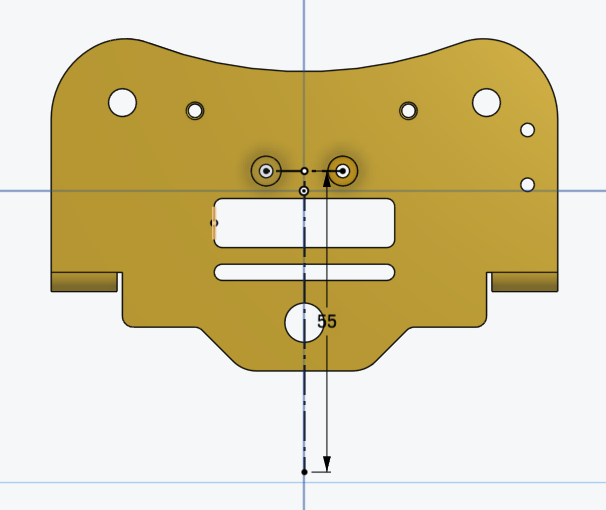
So I created another sketch to create spacer for this metal carriage base and extruded it 4mm to give it a little bit of rigidity.
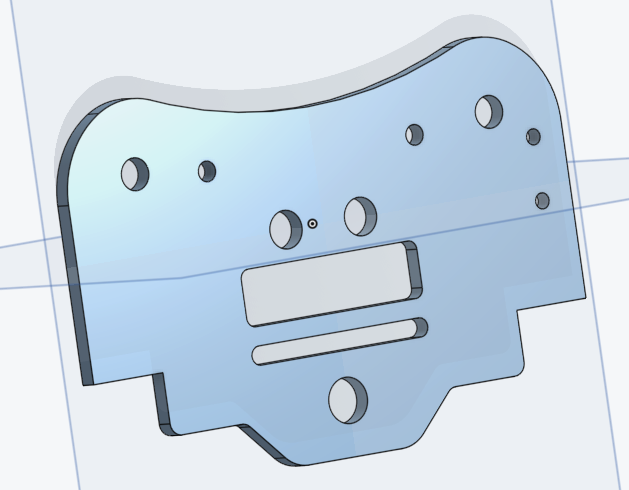
Now the fun/fan part, how to squeeze the fans in such a way to make it super close to each other and also how to make air canals for it.
The concept was to put the 4010 radial fans from left and right side, squeeze 4020 axial fan in between and move as close as possible to hotend. I thought that good idea would be to slide the 4010 fans into their places from the back and when screwing assembly together they would jam themselves and lock into position in the carriage:
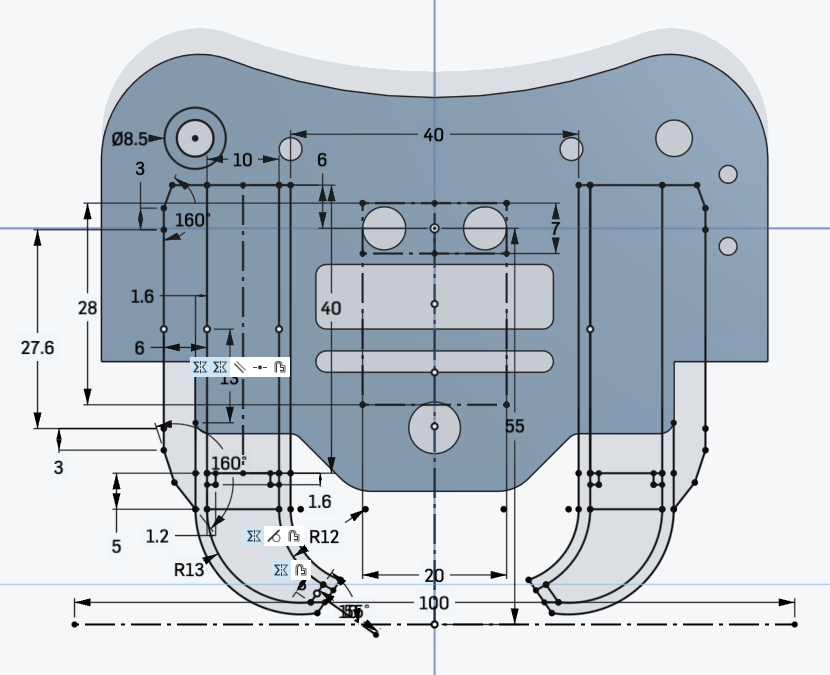
Some extruding later / magic operations it was looking like this:
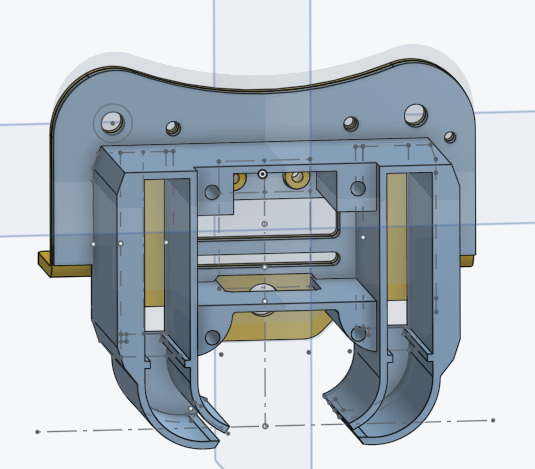
The little tabs inside 4010 fan holes keeps the fans in place and ensures proper fitment without rattling, also putting them from back gives this a benefit of not using any screws, so moar weight reduction!
As you can see there is a 4020 fan that is squeezed between the two radial 4010 fans, it gives the hotend plenty of cooling ability, but it's not the end of mount yet. Redirecting air from such fan is a challenge when cooling area of hotend is basically non existent in comparison to any v6 style hotend. Let's close the fan holes and test fit it on CAD model:
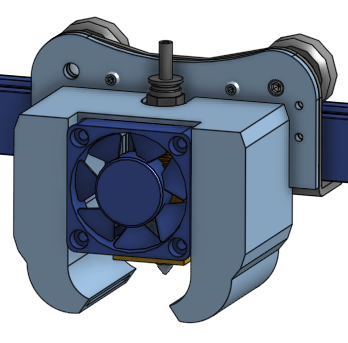
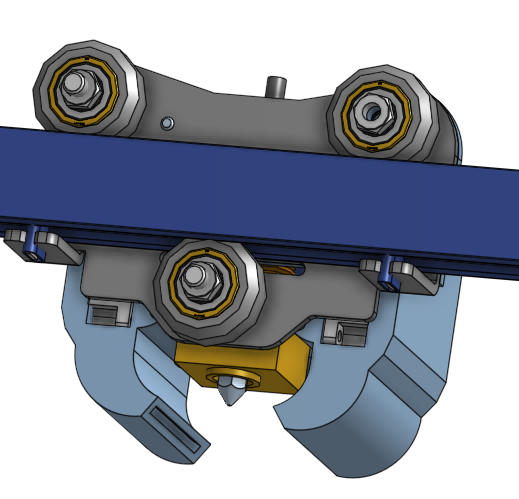
Nice! It fits very nice, and fans are in place with really tight tolerances. Of course for now we're missing fan holes for blades, but that will come soon!
I'm obsessed with having good rigidity on my printed parts, that's why I added some "ribs" as supports for extruder fast movements when retracting. The extruder mounts in heat inserts, but in v2 I'll change that for hex nuts with nylon insert to have always tightened hotend with solid mounting.
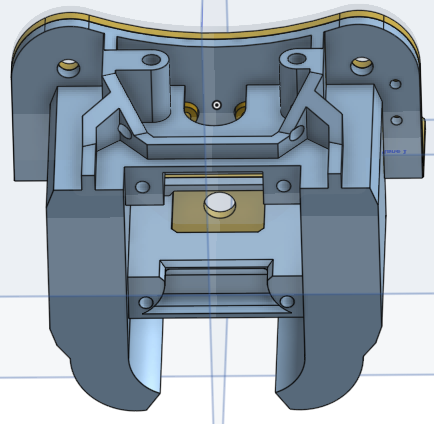
Mount for bltouch was simple task, but later we gonna find out that it is kinda weirdly placed and I don't know if it would cause any problems for fan drawing air.
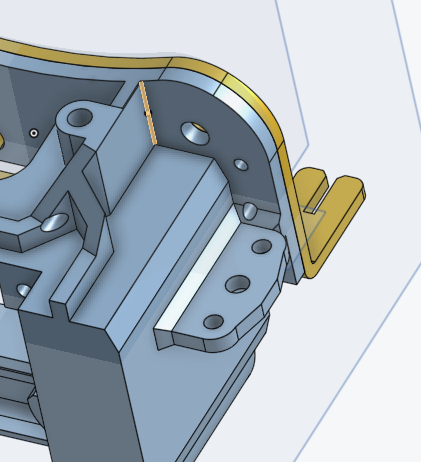
Boom! Quick end easy mount with some sexy chamfers. Let's add the holes for fan blades on the sides:
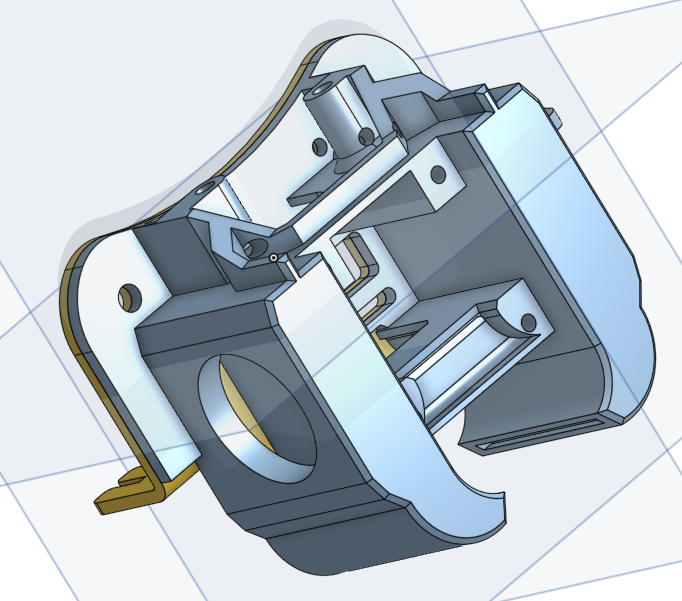
Looks good, but I need some fillets on those holes to look nice:
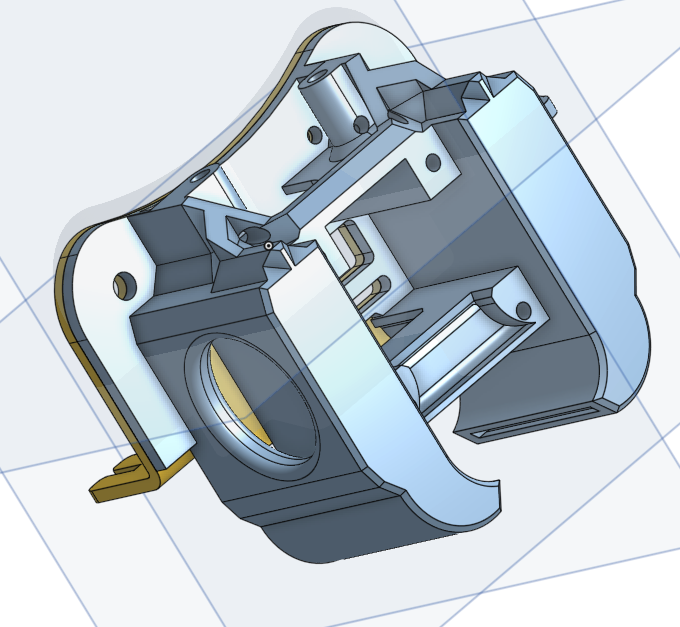
I was wondering where this could mount in order to pack it somehow tight and not disturb anything, after some fiddling with angle and spacing from extruder I was able to make mount for ADXL really close of extruder and also the cables have already a hole for routing them so win win!
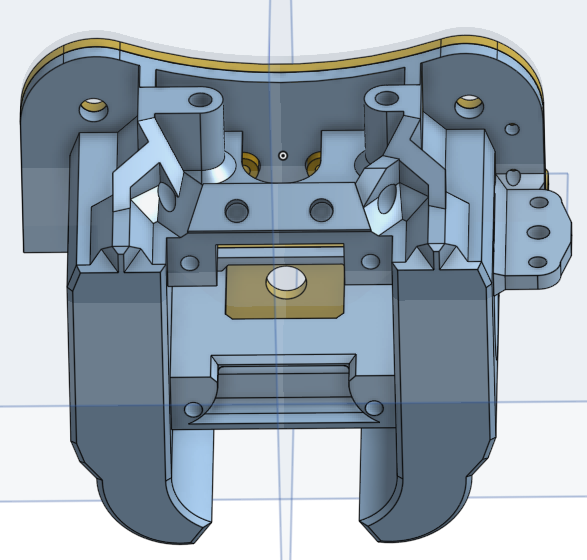
For the next step I want to have rail of some sorts to zip tie cable loom together after install. The solution that I've implemented is mediocre, and I wanna change it in the future.
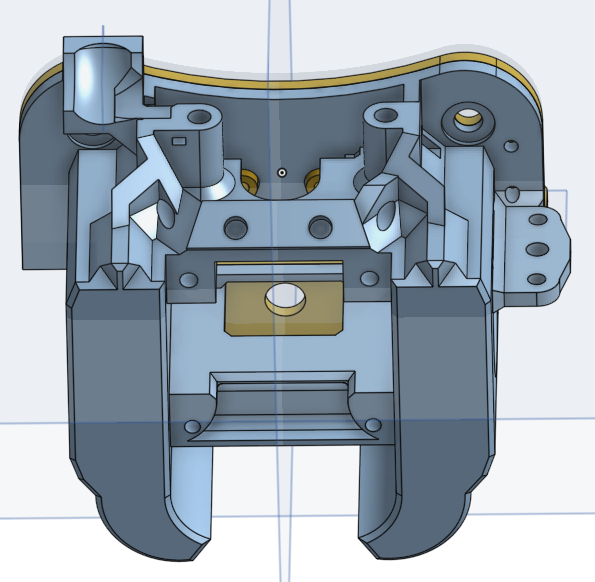
After some more fixes in sketches etc I had a final look of the carriage before buddy of mine printed it. The finished gantry adapter V1 looks like this on printer CAD model:
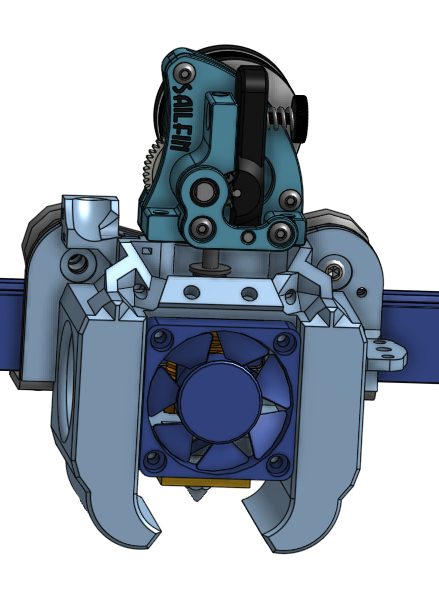
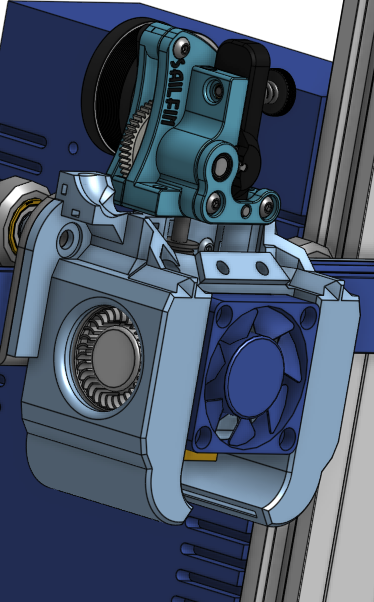
Love it! Looks amazing and meets all of my criteria. Now it was time to print this bad boy from red ABS filament on this exact printer that was modified. It had a chamber, silicone spacers and klipper installed so it was already printing decent.
Time to mount this thing into the printer! Parts used for this pimped out mod are:
We found out that we have 2 places that needs a bigger offsets and 1 place where cut is needed to fit everything in. To fit this thing we simply used dremmel to grind some plastic off as a temporary solution (I still need to fix the model tho). The finished build looked like this without adxl and bltouch since my friend is lazy and has no urge to add aditional wires into the printer:
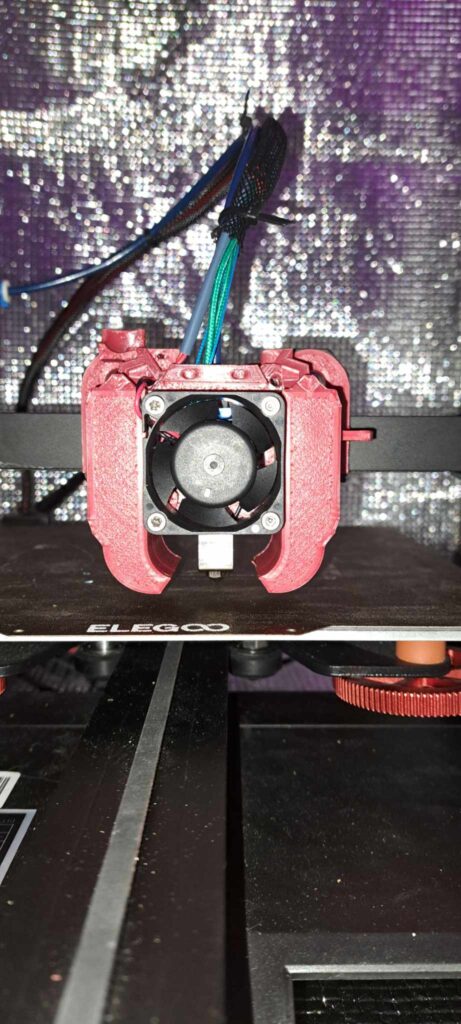
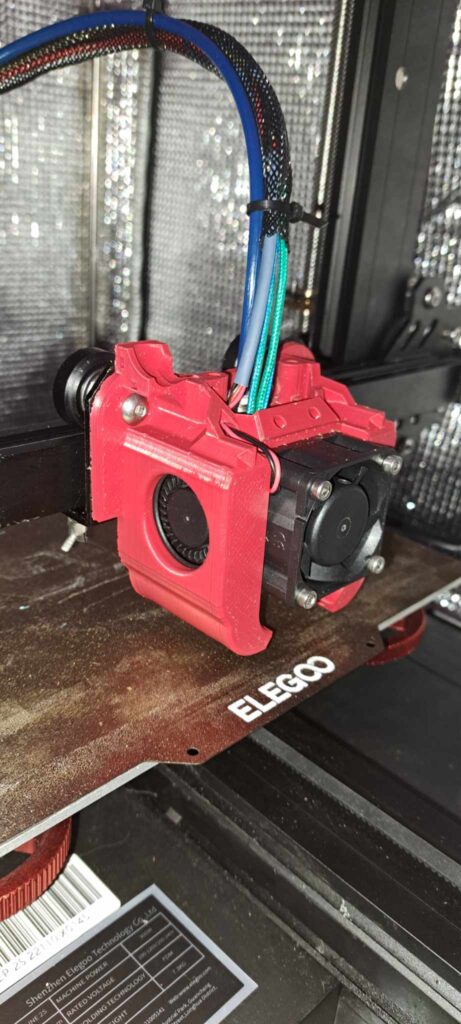
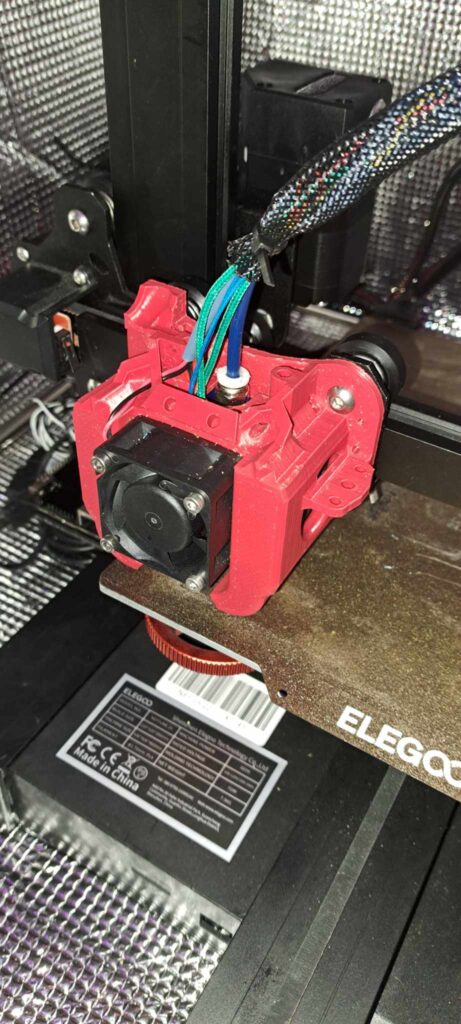
This combo is performing great, but the full spectrum will be known after ADXL compensation and bltouch installation. The flow is great even on this bowden setup. Carriage holds with really good power ensuring no movements during even extreme things. Radial fans are snug and not rattling, the speeds are in ballpark of 2000 acceleration 180mm/s movements on x/y axis. My hope is that after ADXL compensation and bed leveling with bltouch, some new belt tensioners / gates belts and sailfin on top it should push the limit up to 4k - 5k. My mission is to achieve 4.5k acceleration, but I don't know if bed will handle it. It is small but my vyper sits around 3.6k and anything more just crashes the Y axis.
Here is the photo of some prints after mods:
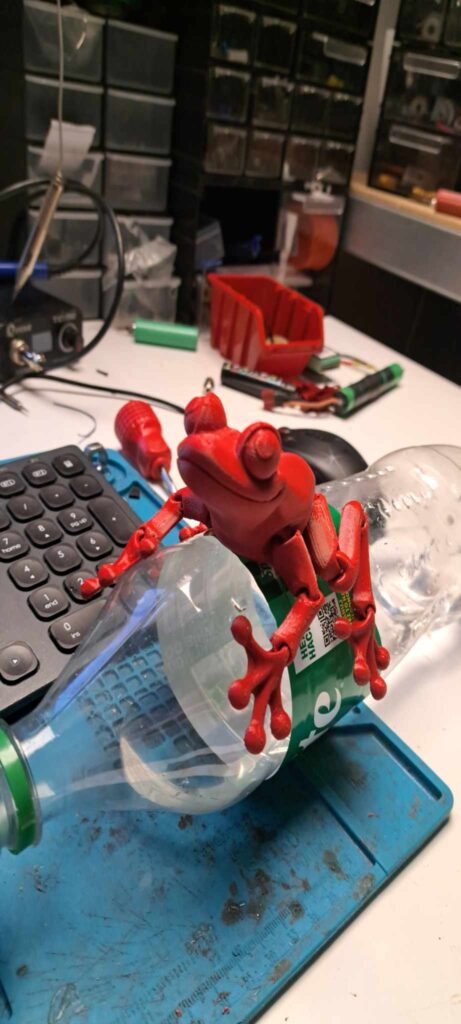
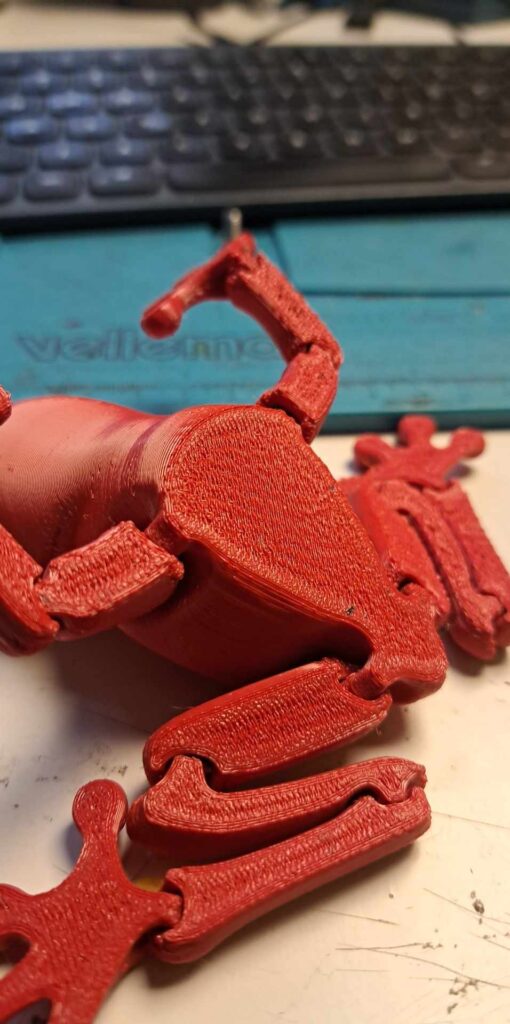
It needs some more tuning, but overall for a that cheap printer printing pure abs i think it's a success! Tolerances are okay, but could use a little bit of adjustment. How do you like it? I hope that this article was a great source of knowledge for you. Until my next one!